Help keep this website stay online by supporting us in ways you can!
Happy Plants Start with Happy Soil: Understanding Your Soil Before You Plant
Blog post description.
BLOGREVIEW
3/22/20244 min read


Have you ever planted a beautiful tomato plant, only to see it struggle and wilt? The culprit might be unhappy soil! Before you get your hands dirty planting seeds or seedlings, it's important to understand what's going on beneath the surface. Just like us, plants need the right nutrients to thrive. Conducting a simple soil test is like giving your soil a check-up, revealing its strengths and weaknesses. [ this article contain affiliate link that may earn me commission]
Imagine your soil as a delicious smoothie. A perfect smoothie has the right balance of fruits, vegetables, and yogurt to keep you energized. Soil needs a balance of nutrients too! A soil test will tell you the pH level of your soil (similar to how some foods are acidic like lemons and others are basic like baking soda) and the nutrient content, including nitrogen, phosphorus, and potassium.
What Does a Soil Test Reveal?
pH Level: The pH scale runs from 0 (very acidic) to 14 (very alkaline), with 7 being neutral. Most plants prefer slightly acidic soil, around a pH of 6.0 to 7.0. If your soil test reveals a different pH level, don't worry! We'll discuss how to adjust it in a future article.
Nutrients: The soil test will also indicate the levels of nitrogen, phosphorus, and potassium (often abbreviated as N-P-K). These nutrients are essential for plant growth:
Nitrogen: Helps plants grow leaves and stems
Phosphorus: Encourages root development and flowering
Potassium: Promotes overall plant health and disease resistance
How to Conduct a Soil Test
There are two main ways to conduct a soil test:
Purchase a home soil test kit: These kits are readily available at most garden centers and provide easy-to-follow instructions. You'll collect a small soil sample from your garden bed, mix it with water or a testing solution, and follow the kit's instructions to interpret the results.
Send a soil sample to a lab: For a more detailed analysis, you can send a soil sample to a professional lab. This option is typically more expensive but can be helpful if you have specific concerns about your soil.
By taking the time to understand your soil through a simple test, you can set your plants up for success! In the next article, we'll explore how to amend your soil based on the results of your test, providing your plants with the perfect foundation for flourishing.
Taking the Mystery Out of Meters: Using a pH Tester in Your Garden
Ever wondered why some plants thrive in your garden while others seem to struggle? The secret might lie in your soil's pH level! Just like some people prefer sweet treats while others favor savory snacks, plants have preferences too. Most plants prefer slightly acidic soil, around a pH of 6.0 to 7.0. A handy tool to unveil this secret is a pH tester. Let's explore how to use this nifty gadget to ensure your plants have a happy home!
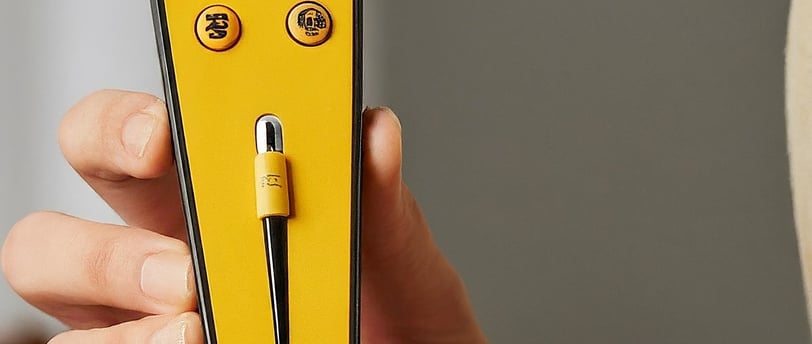
A pH tester is a small device that electronically measures the acidity or alkalinity of a substance. In the gardening world, we use it to measure the pH level of our soil. Think of it like a little detective, uncovering the hidden clues about your soil's composition.
There are two main types of pH testers:
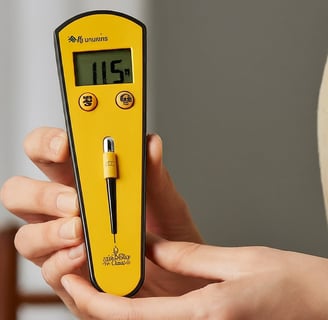
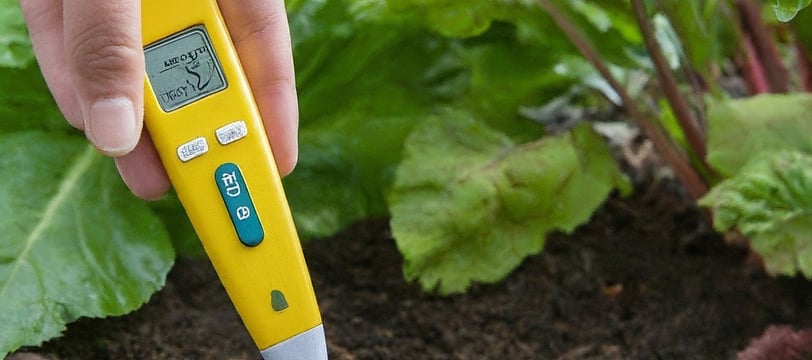
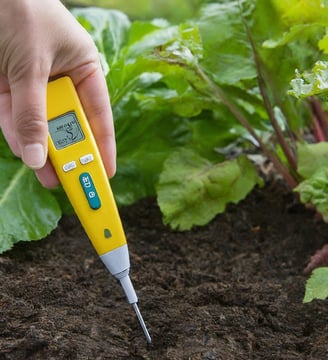
Digital pH testers: These user-friendly testers have a probe and a digital display. Simply insert the probe into moist soil and the display will show you the pH level.

Analog pH testers: These testers are less common but still effective. They have a probe and a color chart. Insert the probe into moist soil, rinse it clean, and then dip it into a solution that comes with the tester. The color the probe turns will correspond to a pH level on the included chart.
How to Use a Digital pH Tester:
Moisten your soil: For the most accurate reading, ensure the soil is slightly damp.
Turn on your tester: Most digital testers have a power button.
Insert the probe: Push the probe into the moist soil, ideally up to the depth where you'll be planting.
Wait for the reading: Digital testers typically take a few seconds to display the pH level.
Rinse and repeat: After taking your reading, rinse the probe with clean water to remove any soil particles and ensure accuracy for future tests.
Tips for Using a pH Tester:
Take multiple readings in different areas of your garden to get a good overall idea of your soil's pH.
Don't test the soil right after watering or fertilizing, as this can temporarily alter the pH level.
Remember, a pH tester is just a tool. The next step is understanding what the reading means and how to adjust your soil if necessary (we'll cover this in a future article!).
By incorporating a pH tester into your gardening routine, you can gain valuable insights into your soil's health and take steps to create an ideal environment for your plants to flourish. Happy testing!